How to Build a DIY Patio Brick in 6 Simple Steps
A brick patio is an excellent addition to any backyard. It can provide a cozy and inviting outdoor living, entertaining, and relaxing space. A brick patio is also durable, low maintenance, and easy to customize with different colors, shapes, and patterns of bricks.
Building a brick patio may seem daunting, but it is simple and rewarding. You don’t need special skills or tools, just some basic materials, time, and effort. This article will show you how to build a DIY patio brick in six simple steps. Let’s get started!

1: First Step on DIY Patio Brick is Mark the Patio Edges
The first step in building a brick patio is to mark the edges of the patio area. This will help you determine how much space you need and how many bricks you need to buy. To mark the patio edges, you will need:
- Stakes
- Mason’s line
- Measuring tape
- Hammer
How do you mark the patio edges?
- Decide where you want to place your patio and how big you want it to be. You can use an existing structure, such as a house wall or a fence, as a reference point. You can also use a garden hose or a rope to outline the shape of your patio.
- Use a measuring tape to measure the length and width of your patio. Ensure the dimensions are based on the brick paver size, and avoid cutting bricks if possible. For example, if you use bricks that are 4 inches by 8 inches, you can make your patio 8 feet by 12 feet, 16 feet by 24 feet, and so on.
- Drive a stake into the ground at each corner of your patio. Use a hammer to secure the stakes firmly. You should have four stakes for a rectangular patio or more for a curved or irregular patio.
- Tie a mason’s line to one of the stakes and stretch it to the opposite. Make sure the line is tight and level. Repeat this for the other pair of stakes. You should have two layout lines that cross at the center of your patio.
- Check the layout lines for squareness by using the 3-4-5 rule. This means that for a right triangle, the square of the hypotenuse (the longest side) equals the sum of the squares of the other two sides. To apply this rule, measure 3 feet along one line from the center point and mark it. Then, measure 4 feet along the other line from the center point and mark it. Finally, measure the distance between the two marks. It should be 5 feet. If not, adjust the stakes and lines until it is.
- To make the layout lines more visible, use two stakes at each corner and run the mason’s line between them. This will create a rectangular frame around your patio area.

2: Excavate the Patio Area
The next step in building a brick patio is to excavate the patio area. This means removing the grass and soil from where you want to lay the bricks. To excavate the patio area, you will need:
- Shovel
- Rake
- Wheelbarrow
- Long, straight 2×4 board
- Carpenter’s level
How do you excavate the patio area?
- Use a shovel to dig out the grass and soil from the patio area. You can use a wheelbarrow to transport the removed material to another location or dispose of it properly. You should dig to a depth of about eight inches, plus the thickness of the bricks. For example, if you use two inches thick bricks, you should dig to a depth of 10 inches.
- Use a rake to level the excavated area and remove any rocks, roots, or debris. You want to create a smooth and even surface for the patio base.
- Use a long, straight 2×4 board and a carpenter’s level to check the slope and drainage of the patio area. You want a slight slope away from the house or any other structure to prevent water from pooling on the patio. A good rule of thumb is to have a drop of about one inch for every eight feet of length. To create the slope, you can slightly adjust the excavation depth by adding or removing soil.

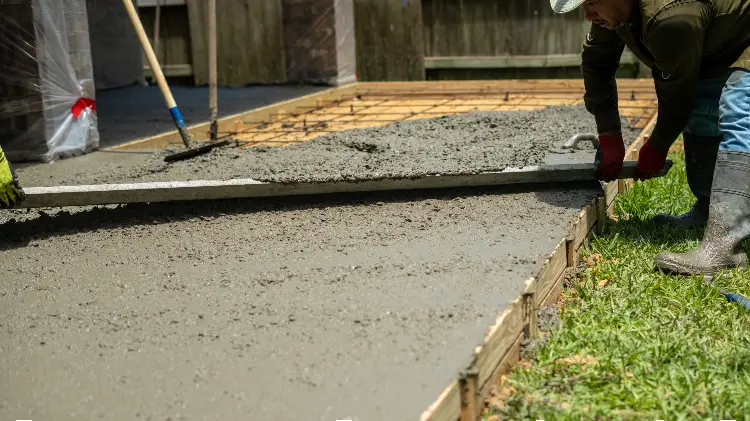
3: Prepare the Patio Base
The third step in building a brick patio is preparing the base. This means creating a sturdy and stable foundation for the bricks. To prepare the patio base, you will need:
- Compatible gravel
- Landscape fabric
- Sand
- Hand tamp or plate compactor
- 2×4 board
How do you prepare the patio base?
- Spread a layer of compactible gravel over the excavated area. You should use about four inches of gravel for the base. You can use a shovel or a rake to distribute the gravel evenly.
- Tamp down the gravel layer with a hand tamp or a plate compactor. You want to compact the gravel as much as possible to create a firm and level base. You can rent a plate compactor from a local hardware store or a home improvement center.
- Lay a sheet of landscape fabric over the gravel layer. This will prevent weeds from growing through the patio and help stabilize the base. You can cut the landscape fabric to fit the patio shape and overlap the edges by a few inches.
- Spread a layer of sand over the landscape fabric. You should use about one inch of sand for the base. You can use a shovel or a rake to distribute the sand evenly.
- Smooth the sand layer with a 2×4 board. You can drag the board across the sand, following the slope and the layout lines. You want to create a flat and uniform surface for the bricks to sit on.

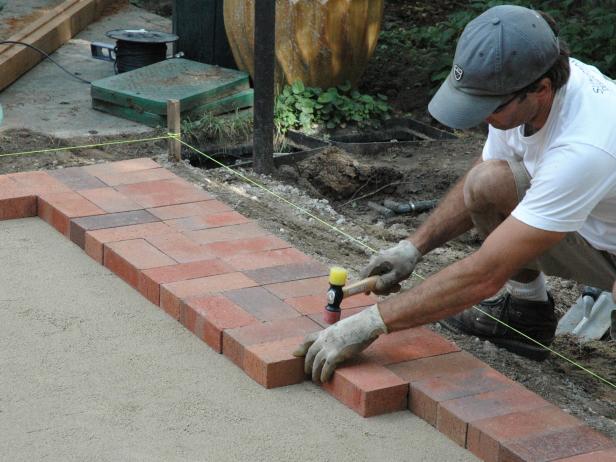
4: Lay the Brick Pavers
The fourth step in building a brick patio is to lay the brick pavers. This means placing the bricks on the sand base and creating the desired pattern. To lay the brick pavers, you will need:
- Brick pavers
- Rubber mallet
- Plywood scrap
- Spacers
How do you lay the brick pavers?
- Start laying the bricks from one corner of the patio, following the layout lines and the chosen pattern. You can use any pattern you like, such as a running bond, herringbone, basketweave, or random. You can also mix and match different colors and shapes of bricks to create a unique design.
- Use a rubber mallet to tap the bricks into place and ensure they are level and aligned. When tapping the bricks, you can use a plywood scrap to protect them from damage. You can also use a carpenter’s level to check the level of the bricks.
- Use spacers to maintain consistent gaps between the bricks. You can use small objects like nails, coins, or wood chips as spacers. You should leave about a quarter inch of space between the bricks to allow sand filling and expansion.
- Continue laying the bricks until you cover the entire patio area. You can use a brick splitter or a wet saw if you need to cut any bricks to fit the edges or curves. You can rent these tools from a local hardware store or a home improvement center.

5: Install the Patio Edging
The fifth step in building a brick patio is to install the patio edging. This means securing the patio’s perimeter and preventing the bricks from shifting. To install the patio edging, you will need:
- Brick patio edging
- Spikes or nails
- Hammer
- Hacksaw or circular saw
How to install the patio edging?
- Use brick patio edging to secure the perimeter of the patio. Brick patio edging is a flexible plastic or metal strip that conforms to the shape of the patio and holds the bricks in place. You can choose from different colors and styles of edging to match your patio design.
- Follow the manufacturer’s instructions for installing the edging. Typically, you must place the edging along the patio’s edge, with the bottom lip under the bricks and the top lip over the bricks. You will also need to use spikes or nails to anchor the edging to the ground at intervals of about 18 inches.
- Use a hacksaw or a circular saw to cut the edging to fit the patio shape. You can use a miter box or a speed square to make accurate cuts. You should also overlap the ends of the edging by about six inches and secure them with spikes or nails.

6: Fill the Joints and Finish the Patio
The final step in building a brick patio is to fill the joints and finish the patio. This means filling the gaps between the bricks with sand and adding finishing touches to the patio. To fill the joints and finish the patio, you will need:
- Sand
- Polymeric sand
- Broom
- Garden hose
- Furniture, plants, or accessories
How do you fill the joints and finish the patio?
- Sweep sand into the joints between the bricks. You can use regular sand or polymeric sand for this step. Polymeric sand is a special sand that hardens when wet, creating a stronger and more durable bond between the bricks. It also helps to prevent weeds and insects from invading the joints. If you use polymeric sand, follow the manufacturer’s instructions carefully.
- Tamp down the sand with a mallet or a compactor. You want to fill the joints and compact the sand as much as possible.

- Wet the patio with a garden hose and let it dry completely. This will activate the polymeric sand and lock the bricks in place. You may need to repeat this step a few times, depending on the weather and the type of sand you use.
- Add furniture, plants, or accessories to enhance the patio’s look and functionality. You can choose from various options, such as chairs, tables, umbrellas, cushions, rugs, pots, lanterns, or sculptures. You can also use some lighting, such as string, solar, or candles, to create a cozy and romantic atmosphere at night.

Final Thoughts
Building a brick patio is a simple and rewarding project that can transform your backyard into a beautiful and comfortable outdoor space. Following the six steps outlined in this article, you can create a brick patio that suits your style, budget, and needs. You can customize your patio with different bricks, patterns, and accessories to make it your own.
We hope you enjoyed this article and learned something new about DIY patio brick. We would love to see your results if you decide to try this project.
Jl.Surjan
Disclosure: Our blog contains affiliate links to products. We may receive a commission for purchases made through these links. However, this does not impact our reviews and comparisons. We try our best to keep things fair and balanced, in order to help you make the best choice for you.