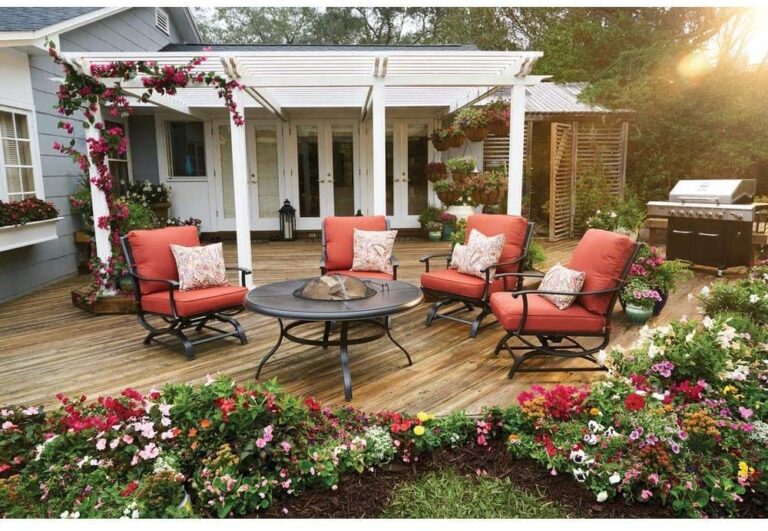
Building Patio Planters – Beautiful and Budget-Friendly
Do you want to add some color, fragrance, and freshness to your outdoor space? Do you want to grow your own herbs and vegetables in a convenient and attractive way? Do you want to save money on store-bought planters that are often overpriced and bland? If you answered yes to any of these questions, then this article is for you.
In this article, you’ll learn about building patio planters with simple materials, tools, and skills. You’ll be able to customize the size, shape, and style of your planters to suit your space and taste. You’ll also be able to finish and decorate your planters to make them look amazing. And best of all, you’ll be able to enjoy the fruits of your labor and the compliments of your guests.

1: Choose the Size and Shape of Your Planters
Before you start cutting and assembling your planters, you need to decide on the size and shape of them. This will depend on several factors, such as:
- The space is available on your patio or balcony. You don’t want your planters to be too big or too small for your outdoor area. You also want to leave some room for walking and sitting around them.
- The number and type of plants you want to grow. Different plants have different needs for sunlight, water, and soil. You also want to consider the height and spread of your plants and how they will look together in your planters.
- Your personal preference and style. You can choose from a variety of shapes and styles for your planters, such as rectangular, square, hexagonal, tiered, or curved. You can also mix and match different shapes and sizes to create a more interesting and dynamic look.

To help you choose the size and shape of your planters, you can use some online tools, such as this planter calculator or this planter box design tool. You can also sketch out your ideas on paper or cardboard and measure the dimensions with a tape measure.
Examples of different shapes and styles of planters
Here are some examples of different shapes and styles of planters that you can build:
Rectangular planters are the most common and versatile type of planters. They are easy to build and can fit in any space. You can make them as long or as short as you want and adjust the width and depth according to your plants’ needs. You can also stack them or arrange them in rows or patterns.

Square planters are similar to rectangular planters but have equal sides. They are ideal for small spaces or corners and can create a symmetrical and balanced look. You can also use them to grow a single large plant, such as a tree or a shrub, or a group of smaller plants, such as herbs or flowers.

Hexagonal planters are more unique and eye-catching than rectangular or square planters. They have six sides and angles, which can add some geometric interest and contrast to your patio. You can make them as big or as small as you want and combine them with other shapes and sizes to create a honeycomb effect.

Tiered planters are perfect for maximizing the vertical space on your patio. They consist of two or more planter boxes stacked on top of each other, with each box slightly smaller than the one below. They can create a cascading and lush look and allow you to grow more plants in less space. You can also vary the height and number of tiers and the shape and size of each box.
Curved planters are more challenging to build than straight planters, but they can create a more organic and natural look. They can follow the contour of your patio or balcony or create a circular or oval shape. You can also use them to create a focal point or a border for your outdoor area.

Tips to Help You on Building Patio Planters
When choosing the size and shape of your planters, you also want to optimize the use of wood and minimize waste. Here are some tips to help you do that:
- Use standard lumber sizes, such as 2x4s, 2x6s, or 2x8s, which are readily available and affordable. You can also use reclaimed or recycled wood, such as pallets, fence boards, or crates, which can add some character and charm to your planters.
- Cut multiple pieces at once using a circular saw and a speed square. This will save you time and ensure that your pieces are uniform and accurate. You can also use a jig or a template to guide your cuts, especially for angled or curved pieces.
- Use the offcuts or scraps from your cuts to make smaller or narrower pieces, such as the legs, the trim, or the bottom shelf. You can also use them to make other projects, such as birdhouses, coasters, or signs.

2: Cut and Assemble the Planter Box
Once you have chosen the size and shape of your planters, you can start cutting and assembling the planter box. The planter box is the main part of your planters, where you will put the soil and the plants. To cut and assemble the planter box, you will need the following tools and materials:

- A circular saw was used to cut the wood pieces for the planter box.
- A jigsaw to cut the curved or angled pieces, if any.
- A tape measure is used to measure the length and width of the wood pieces.
- A pencil is used to mark the dimensions and angles of the wood pieces.
- A speed square to draw straight and perpendicular lines on the wood pieces.
- A drill to make holes and drive screws into the wood pieces.
- Screws to join the wood pieces together. You can use one 1/4-inch screw for the sides and 2-inch screws for the corners.
- Wood glue is used to reinforce the joints and prevent the wood from splitting.
- Clamps to hold the wood pieces in place while you drill and screw them.
- A level to check that the planter box is square and even.
The following diagram and cut list show the wood pieces you need to cut and assemble for a rectangular planter box that is 36 inches long, 18 inches wide, and 12 inches high. You can adjust the dimensions and angles according to your planter’s size and shape.
| Wood Piece | Quantity | Dimensions |
| Side A | 2 | 36 x 11.25 inches |
| Side B | 2 | 16.5 x 11.25 inches |
| Corner C | 4 | 12 x 3.5 inches |
Tips to cut and assemble
To cut and assemble the planter box, follow these steps:
- Cut the wood pieces for the planter box using a circular saw and a jigsaw. Use a tape measure, a pencil, and a speed square to mark the dimensions and angles on the wood pieces. Cut along the lines and sand the edges to smooth them.
- Assemble the planter box using a drill, screws, wood glue, clamps, and a level. Start by attaching corners C to sides A and B using wood glue and screws. Make sure the corners are flush with the edges of the sides and the sides are perpendicular to each other. Use clamps to hold the pieces in place and a level to check that they are square and even. Repeat for the other three corners and sides until you have a rectangular box.
- Reinforce the planter box using more screws. Drill and drive two more screws on each corner, one on the top and one on the bottom, to make the planter box stronger and sturdier.
3: Add the Legs and the Bottom Shelf
After you have cut and assembled the planter box, you can add the legs and the bottom shelf to your planters. The legs will elevate your planters from the ground, and the bottom shelf will provide some extra storage space for your tools, pots, or accessories. To add the legs and the bottom shelf to your planters, you will need the following tools and materials:
- A circular saw was used to cut the wood pieces for the legs and the bottom shelf.
- A drill to make holes and drive screws into the wood pieces.
- Screws to join the wood pieces together. You can use 2-inch screws for the legs and one 1/4-inch screws for the bottom shelf.
- A level to check that the legs and the bottom shelf are level and even.

The following diagram and cut list show the wood pieces you need to cut and attach for the legs and the bottom shelf of a rectangular planter that is 36 inches long, 18 inches wide, and 12 inches high. You can adjust the dimensions and angles according to your planter’s size and shape.
| Wood Piece | Quantity | Dimensions |
| Leg D | 4 | 18 x 3.5 inches |
| Shelf E | 5 | 34.5 x 3.5 inches |
Tips to add the legs and the bottom shelf
To add the legs and the bottom shelf to your planters, follow these steps:
- Cut the wood pieces for the legs and the bottom shelf using a circular saw. Use a tape measure, a pencil, and a speed square to mark the dimensions and angles on the wood pieces. Cut along the lines and sand the edges to smooth them.
- Attach the legs to the planter box using a drill and screws. Position the legs on the inside corners of the planter box and align them with the top and bottom edges. Drill and drive two screws on each leg, one on the side and one on the end, to secure them to the planter box. Use a level to check that the legs are level and even.
- Attach the bottom shelf to the legs using a drill and screws. Position the shelf pieces on the bottom of the legs and space them evenly. Drill and drive one screw on each end of each shelf piece to secure them to the legs. Use a level to check that the bottom shelf is level and even.
4: Finish and Decorate Your Planters
The final step of building your patio planters is to finish and decorate them. This will protect your planters from the weather and insects and make them look more attractive and personalized. To finish and decorate your planters, you will need the following tools and materials:
- Sandpaper to smooth the surface and edges of your planters.
- A stain of your choice to add some color and character to your planters. You can choose from a variety of stains, such as natural, walnut, cherry, or ebony.
- A water-resistant finish to seal and protect your planters from moisture and rot. You can choose from a variety of finishes, such as polyurethane, varnish, or oil.
- Use a brush or a rag to apply the stain and the finish to your planters.
- Some decorative touches, such as trim, paint, hardware, or labels. You can use these to add some style and flair to your planters and to make them more functional and convenient.

Tips to finish and decorate your planters
To finish and decorate your planters, follow these steps:

- Sand your planters using sandpaper. Start with a coarse-grit sandpaper, and work your way to a fine-grit sandpaper. Sand the surface and edges of your planters until they are smooth and even. Wipe off the dust with a damp cloth.
- Stain your planters using a stain of your choice and a brush or a rag. Follow the instructions on the stain container, and apply the stain evenly and generously to your planters. Let the stain soak into the wood for a few minutes, and then wipe off the excess with a clean cloth. Let the stain dry completely, and apply a second coat if needed.
- Seal your planters using a water-resistant finish and a brush or a rag. Follow the instructions on the finish container, and apply the finish evenly and thinly to your planters. Let the finish dry completely, and apply a second coat if needed. Let the finish cure for at least 24 hours before filling your planters with soil and plants.
- Decorate your planters using some decorative touches of your choice. You can add some trim to the edges of your planters using wood glue and nails. You can paint some parts of your planters, such as the legs, the corners, or the trim, using a paint of your choice and a brush. You can add some hardware to your planters, such as handles, hooks, or hinges, using a drill and screws. You can also add some labels to your planters, using a marker, a stencil, or a sticker to identify the plants or the owners.
Final Analysis
Congratulations, you have successfully completed building patio planters. You have learned how to choose the size and shape of your planters, how to cut and assemble the planter box, how to add the legs and the bottom shelf, and how to finish and decorate your planters. You have also saved money, recycled wood, and expressed your creativity.
Now, you can enjoy the benefits and satisfaction of having your own patio planters. You can fill them with your favorite plants, such as flowers, herbs, or vegetables, and watch them grow and bloom. You can also use them to enhance the beauty and comfort of your outdoor space and to impress your guests and neighbors.
We hope you have enjoyed this DIY project and that you have found it easy and fun. We also hope that you have learned some new skills and tips that you can use for other projects. If you have any feedback, questions, or suggestions, please feel free to share them with us. We would love to hear from you.
Jl.Surjan
Disclosure: Our blog contains affiliate links to products. We may receive a commission for purchases made through these links. However, this does not impact our reviews and comparisons. We try our best to keep things fair and balanced, in order to help you make the best choice for you.


